I have said this before, and I will say it hundreds of times more: My goal here is to provide you with information on what works. The caveat here is that I must have experience, and these things must be practical and useful. I am not going to tell you the best way to win a gunfight, because I have never been in one. And I am not going to tell you about rappelling into a confined space, because while I do have experience doing that, it is not useful here. Whatever Garrett and I share with you here has to meet this criteria. And a topic I find directly in the middle of these criteria is concealed carry.
Some of you may be thinking, “If you have never been in a gunfight, what gives you the right to talk about concealed carry?”. And that is a fair question, so let me clarify. I do not believe that concealed carry is about actually using the gun you carry. Rather, I believe that it is the practice and habit of having a capable gun, or guns, to handle a situation you are likely to encounter. Of course, using the gun is an essential part of this, but it is one I will not cover. I want to discuss the traits of actually having the gun and being able to manipulate or “drive” the gun. The main points I will cover today are choosing the right gun, the right ammunition, methods of carrying the gun, the use of an additional gun, and, to close out, what I choose. Keep in mind, I am not telling you a make and model of gun, I am giving you points to consider when choosing a gun, holster, belt, and other things I think are a good idea to look at.
Something I want to address right up front is that this is CONCEALED carry. I do believe that open carry does have a time and place, and there are pictures here of me doing that, but today we are discussing concealed carry. For most people, it is not practical to walk around with a 6-inch barrelled Smith and Wesson Model 29. While that is a fantastic handgun, it is not the most practical for daily carry for most people, but if that is practical for you, who am I to tell you that you are wrong?
Choosing the Right Gun
When choosing a handgun for concealed carry, here are some criteria I believe it is wise to consider. Does the gun have sights you can see, and a trigger you can manipulate? Is the gun reliable? Is this gun one that you will actually carry, or is it going to spend more time being a conversation piece than a carry piece? Is this gun of a serviceable caliber? And can YOU drive this gun effectively? For me, if the gun does not meet all of these criteria, then it is not carried. I consider this to be the bare minimum of things to consider. With that being said, let’s dive deeper into these.
On the topic of sights, this is different for everyone. Each individual sees sights differently; however, there are several combinations that I have found to work well for many people. The first of these is the “three dot” sight. These are not my personal favorites, but I do have to acknowledge that they have been used with great success. These sights feature three “dots”, one on the front sight, and one on each side of the rear sight channel. Oftentimes, these dots are the same color, but it is also not uncommon to see these sights with the front dot being a different color than the two rear dots.
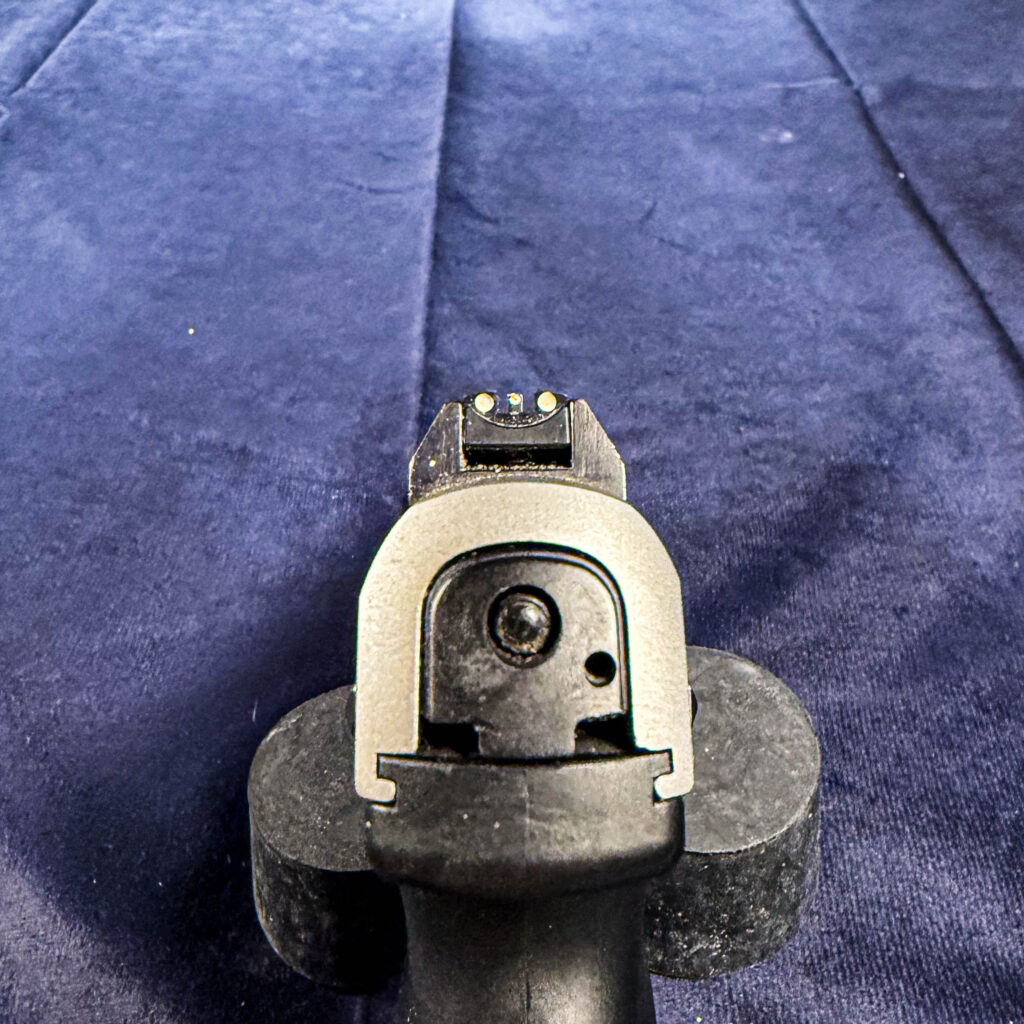
My issue with these sights is that they make the sights all look the same, but many top instructors and people with experience say that we want a front sight focus. If we know that a hard front sight focus is key to good marksmanship, why would I want to make it easy for my eyes to either focus on the rear sight or try to focus on both the front and rear sights at the same time? The most experience I have with this type of sight picture is on the Glock 19X and the Ruger SR9. I found these sights to be “serviceable” but not ones I would buy on my own. They are better than nothing, but better is out there.
The next sight I want to discuss is the “figure 8” sights. I was exposed to these on a Dan Wesson 1911 I used to have. These were my first exposure to sights that were different from the norm. And they did not disappoint. These sights are fast, easy to see, and they keep things simple. The most prevalent of this type of sight I have found is the Heinie sights, which are excellent. I also have a similar sight picture on my West German Sig Sauer P228.
The only downside to my Sig P228 sights is that they are only painted. They feature no illumination. However, even with that downside, I have no trouble using these to shoot quickly and accurately. I have been shooting that P228 for 3 years now and have not felt the need to change the sights yet.
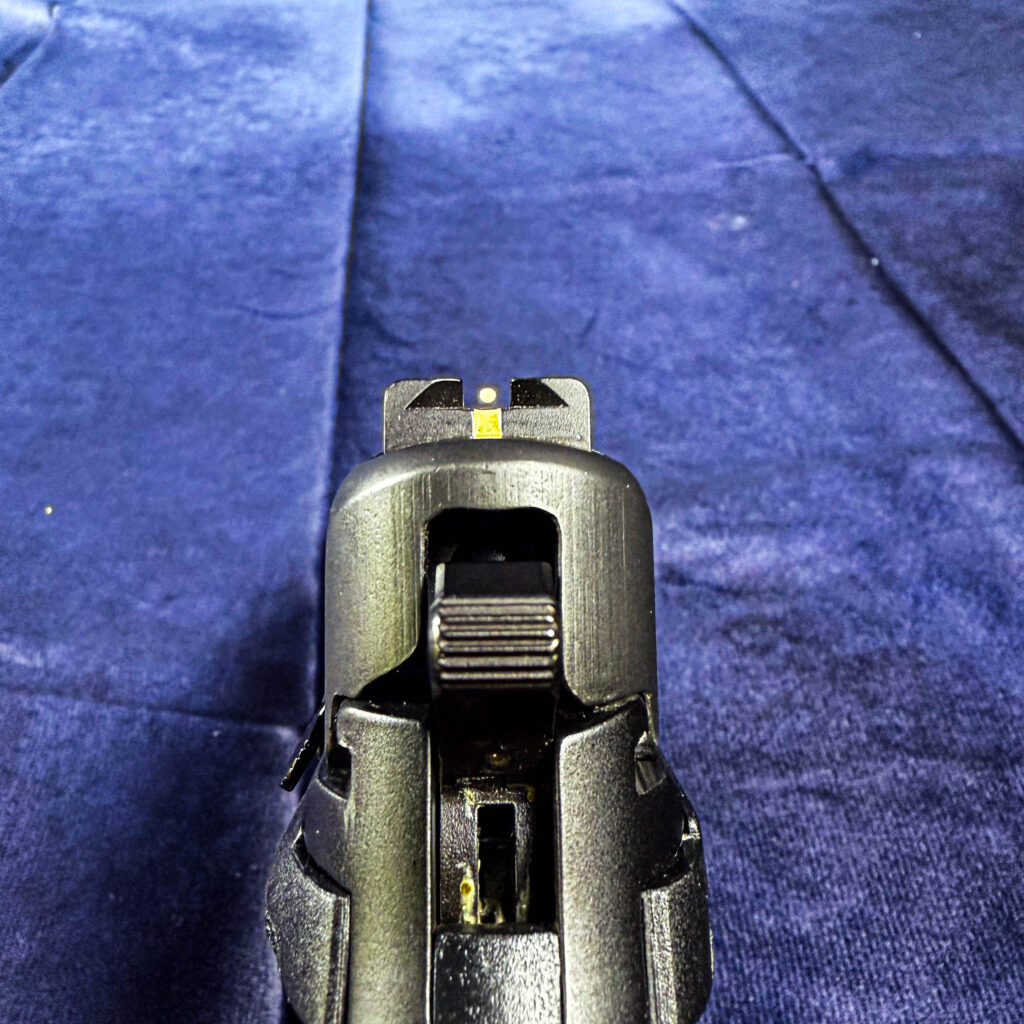
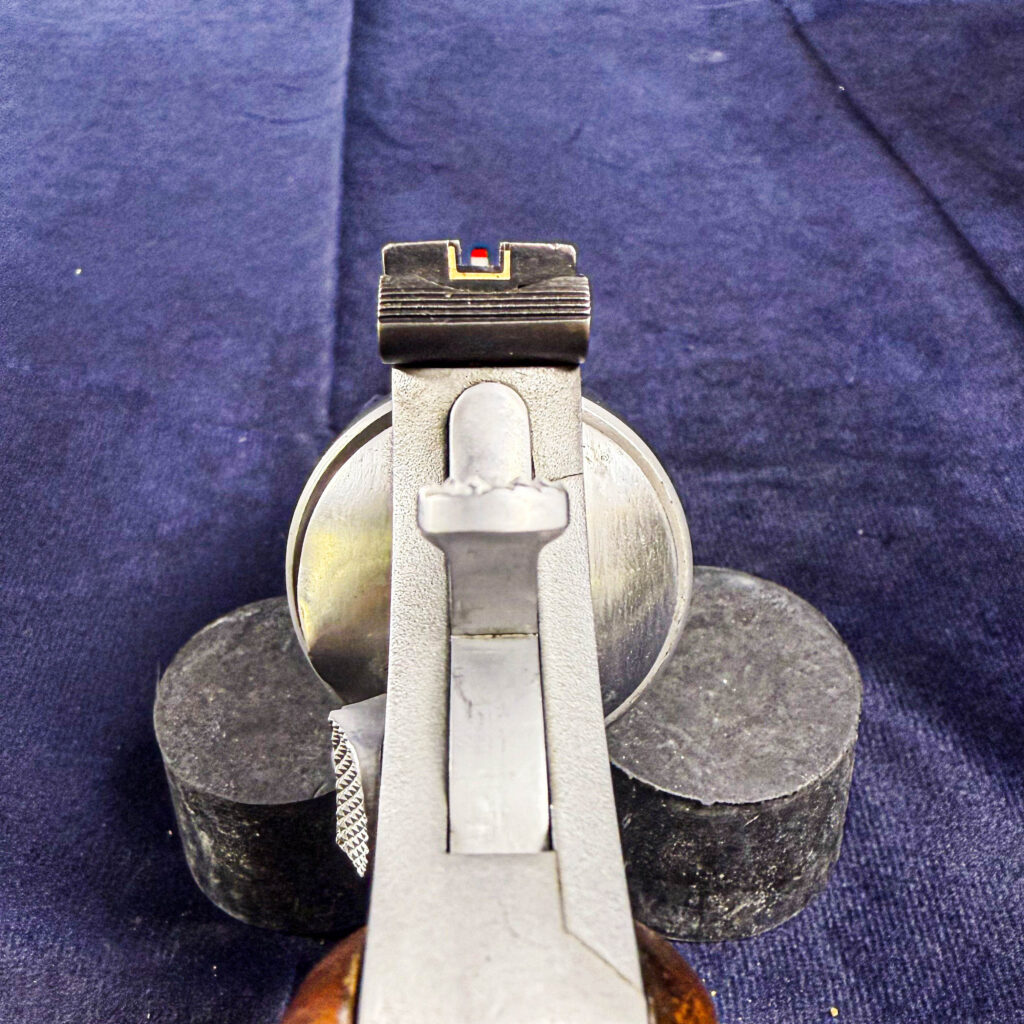
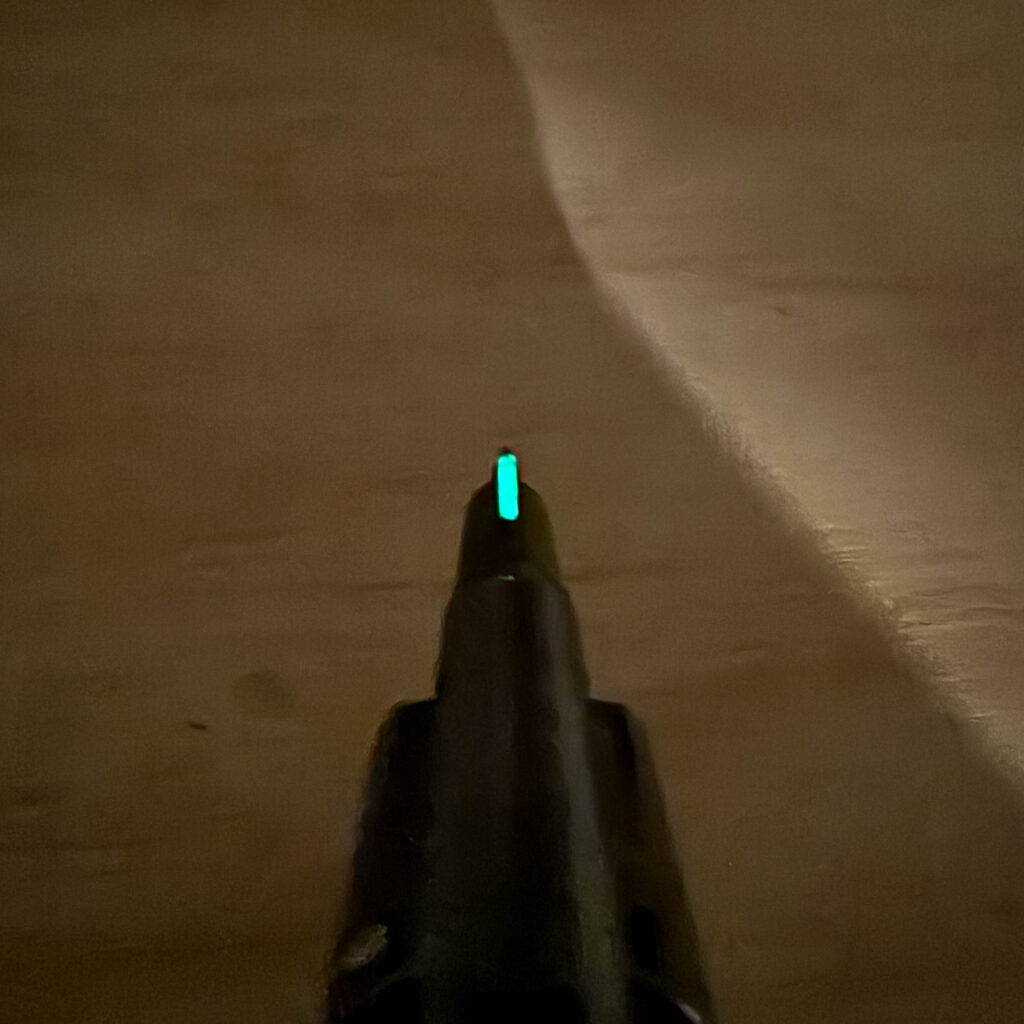
The next sight variety I would like to discuss is the “express” sight. This sight picture features a large front dot with a shallow V-notch rear. Traditionally, the front sights had a large dot of either gold or ivory, but more modern renditions feature a photoluminescent paint with a tritium vial in the center. These sights were pioneered on dangerous game rifles for their speed and high visibility in various lighting conditions. The most popular manufacturer of these sights is XS Sights. I was originally exposed to these by the late James Yeager. Many people know that James was a huge advocate of the Glock 19 with the XS Big Dot sights on them. By the time I got some, they had begun producing the DXT2 series. The DXT2 sights feature either a yellow or orange photoluminescent paint ring with a green tritium vial in the center. I opted for the yellow version, as can be seen below. Another advantage of these sights is that they are at home on almost any gun. Rifles, shotguns, pistols, revolvers, they all can use this sight picture. You can also see below my Remington 870 with a 20-inch rifle-sighted barrel. The barrel is a smooth bore, but it features the rifle sights. These retain the same speed that shotgun beads are known for, but they do make it easier to shoot the gun more accurately. These sights are also incredibly durable, allowing them to stand up to the harsh recoil of heavy 12-gauge buckshot and slugs.
There is one potential downside to these sights. And that is that they are not “target” sights. If you want to shoot a 25-yard bullseye competition, I would not recommend these. However, many have proved that these sights and be used with great accuracy out to extended range. In my experience, it is easy to maintain an acceptable degree of “combat accuracy” with these sights. Meaning that you can keep shots inside an 8-inch circle 25 yards and closer with a handgun, at least with some practice. But then again, I have yet to meet anyone who can shoot 25 yards with a handgun, regardless of sights, without any practice.
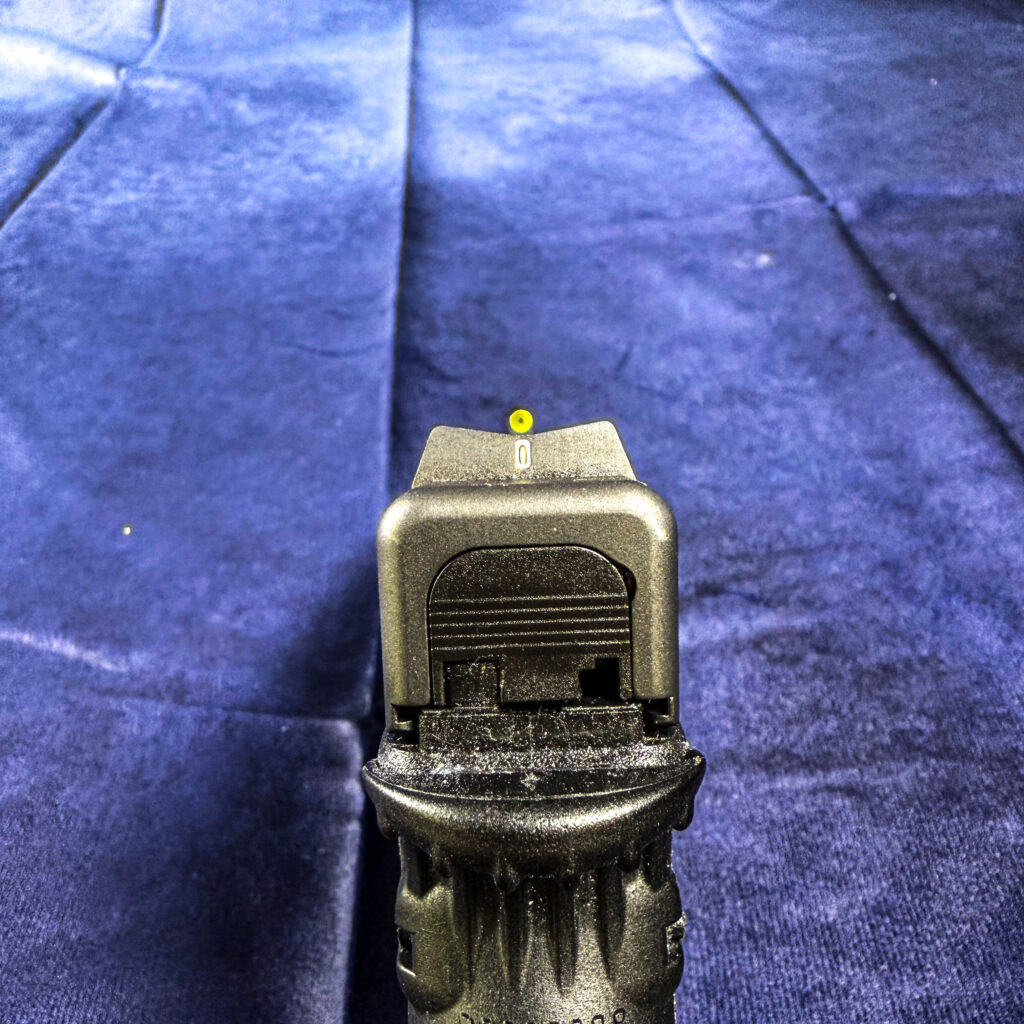
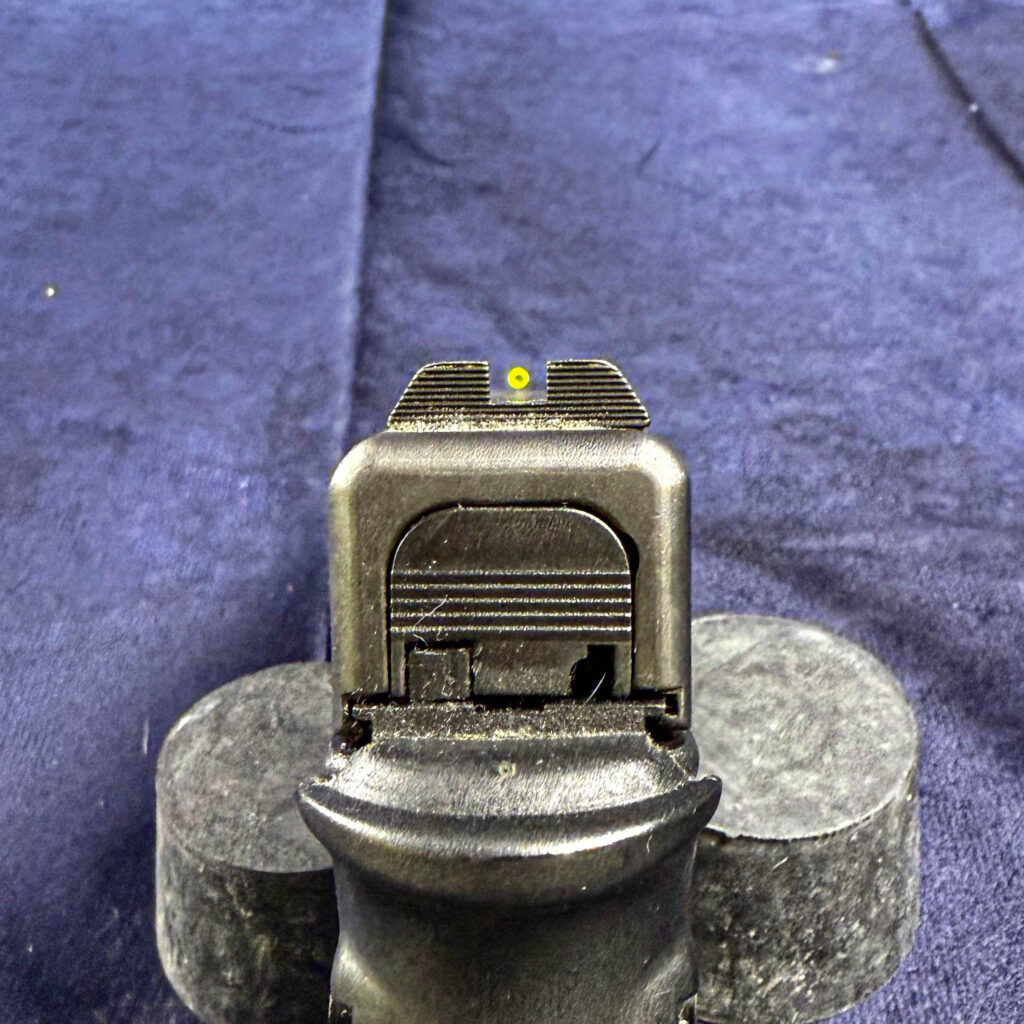
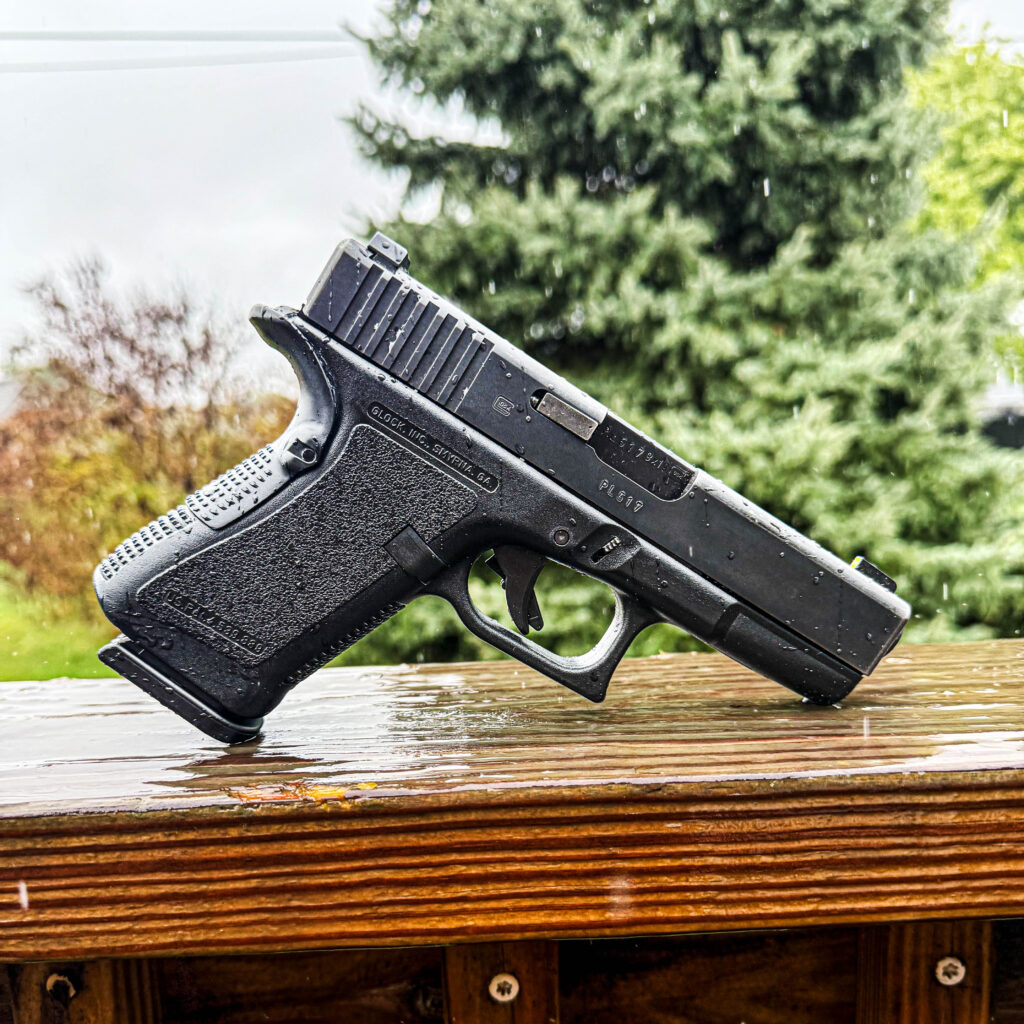
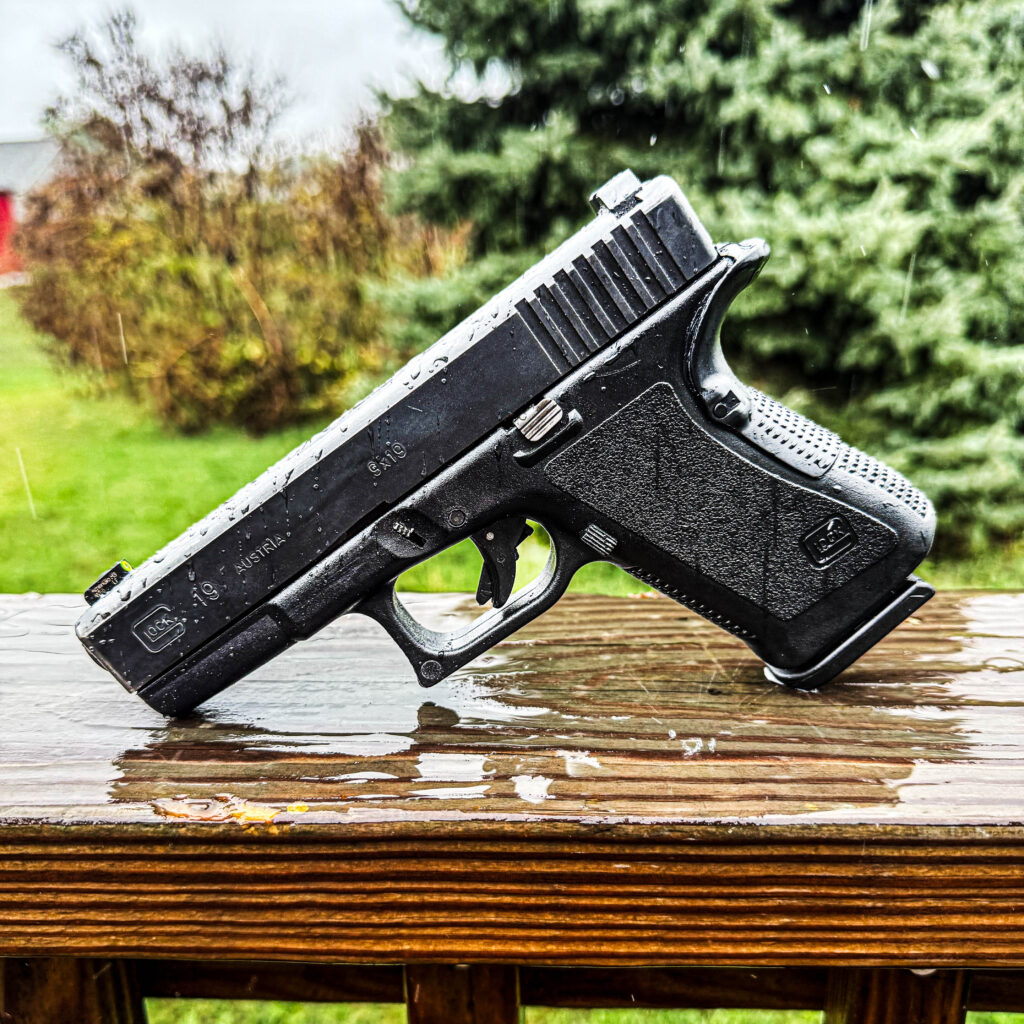
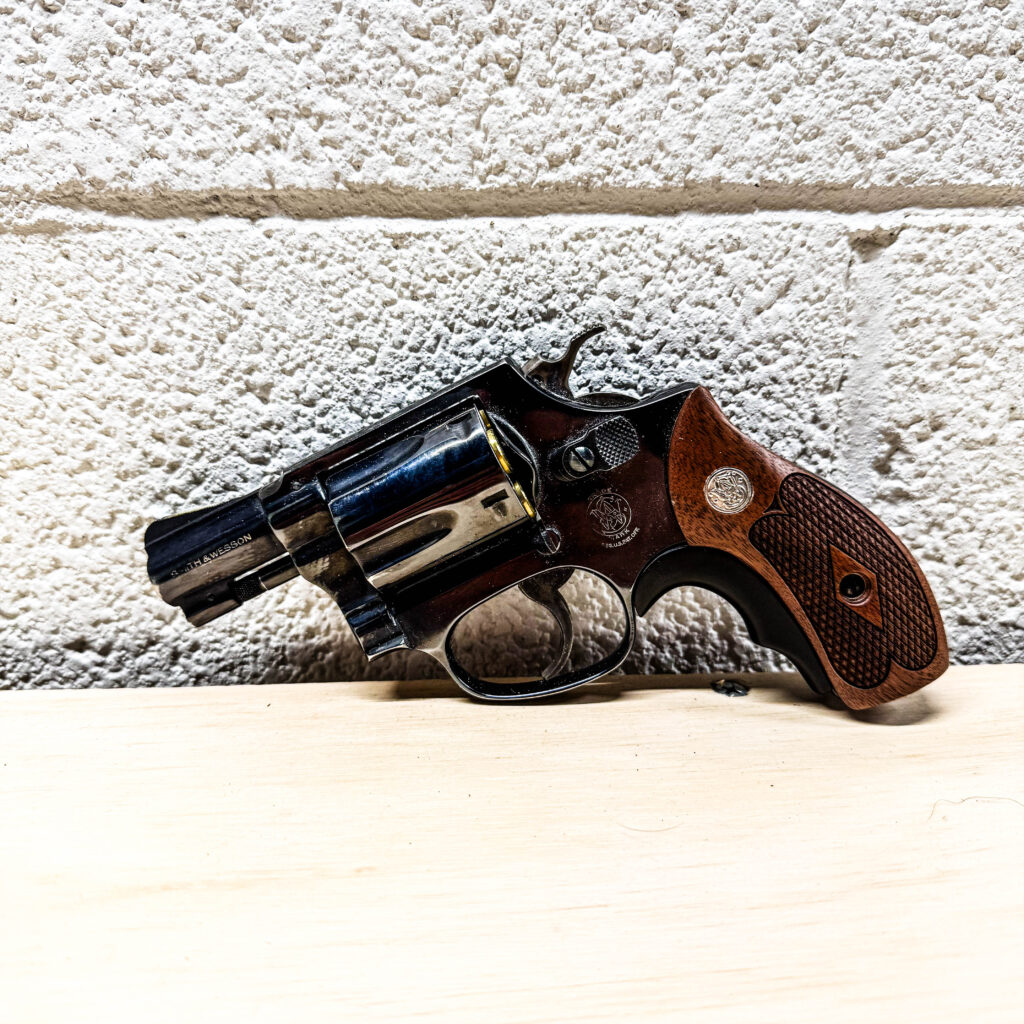
The final type of sight I would like to discuss is my personal favorite. It is the high-visibility, plain rear sight. These commonly feature either a gold/brass bead or a tritium and photoluminescent painted ring on the front sight, with a plain black rear. Other times, the rear will have 2 tritium vials but no paint, offering the plain sight picture during normal light shooting, but a three-dot picture during low light applications. Either sight picture works, but all things being equal, I would rather just use the plain rear sight. Common manufacturers of these sights include XS, Ameriglo, Trijicon, and many more. These are the sights I have the most experience with. I use them on both my Gen 2 Glock 19 and Gen 2 Glock 17, as well as on my Gen 2 Glock 20 (if you haven’t caught on, I am a huge fan of the Gen 2 Glocks). Another version of this sight picture is found on many Smith and Wesson revolvers. Many Smiths come from the factory with a red cast resin front sight insert and a white “U” outline on the rear sight. However, most of my Smiths are old enough that the white paint has worn off, and it more resembles a plain rear sight. These sights are incredibly fast and amazingly accurate, and require minimal maintenance. The tritium versions only need service once every 10-12 years, and the only time I have ever had to service a red insert on a Smith was on my 686 when the revolver had been shot so much the insert turned grey and I was unable to clean it. So I knocked out the old insert and cast a new one.
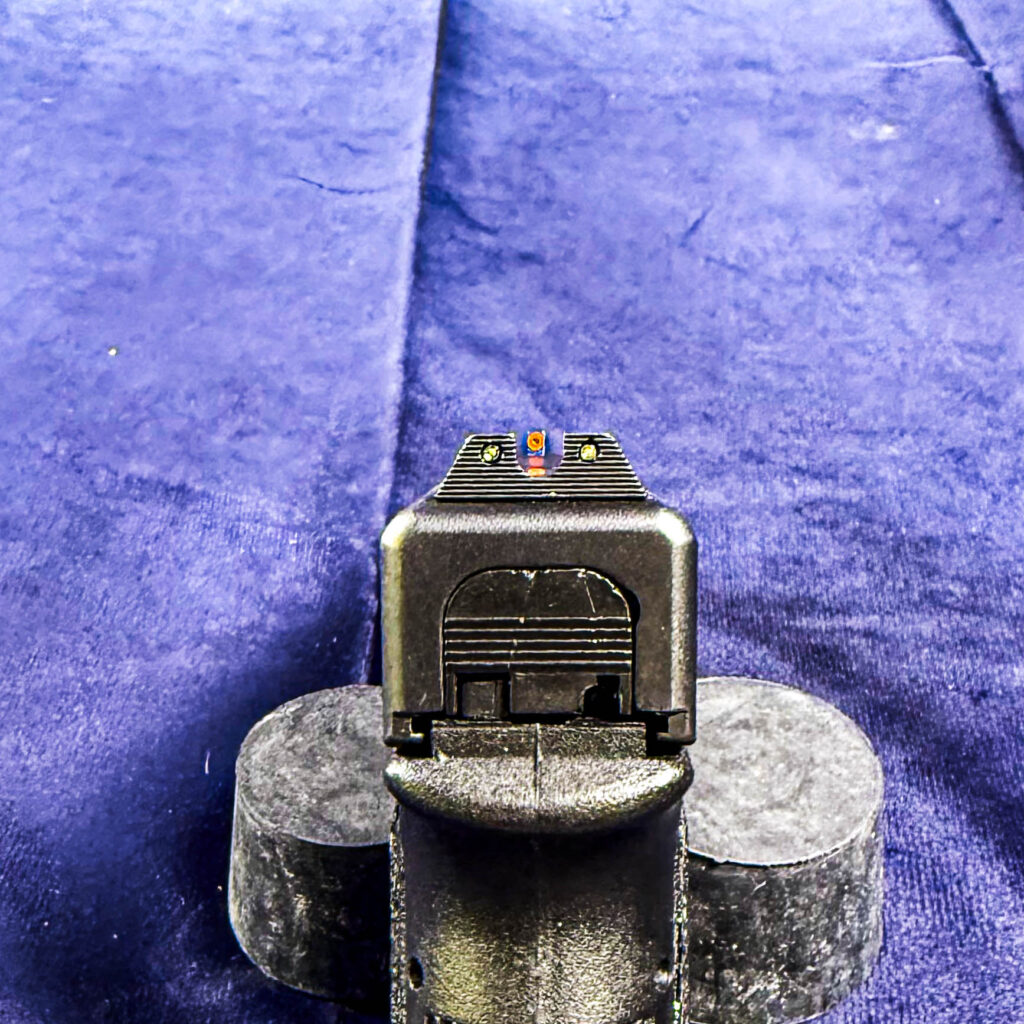
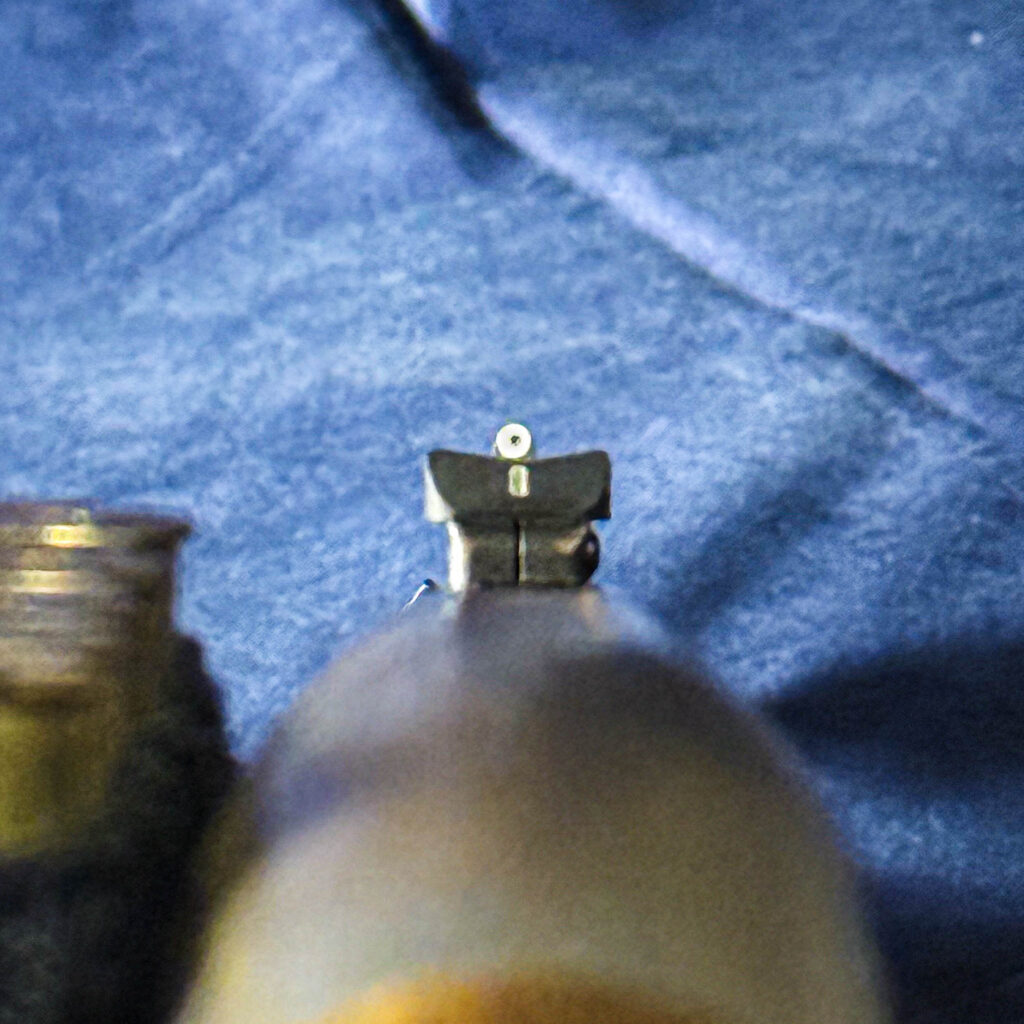
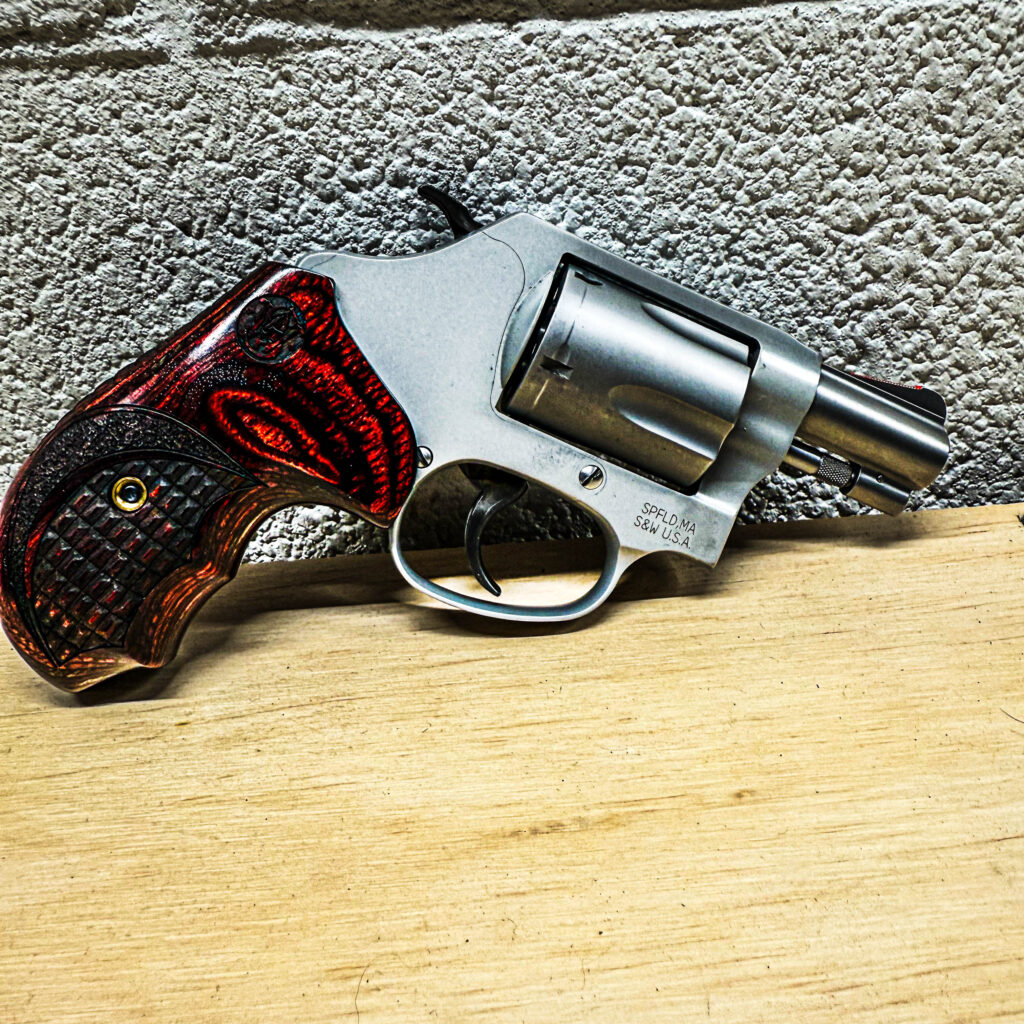
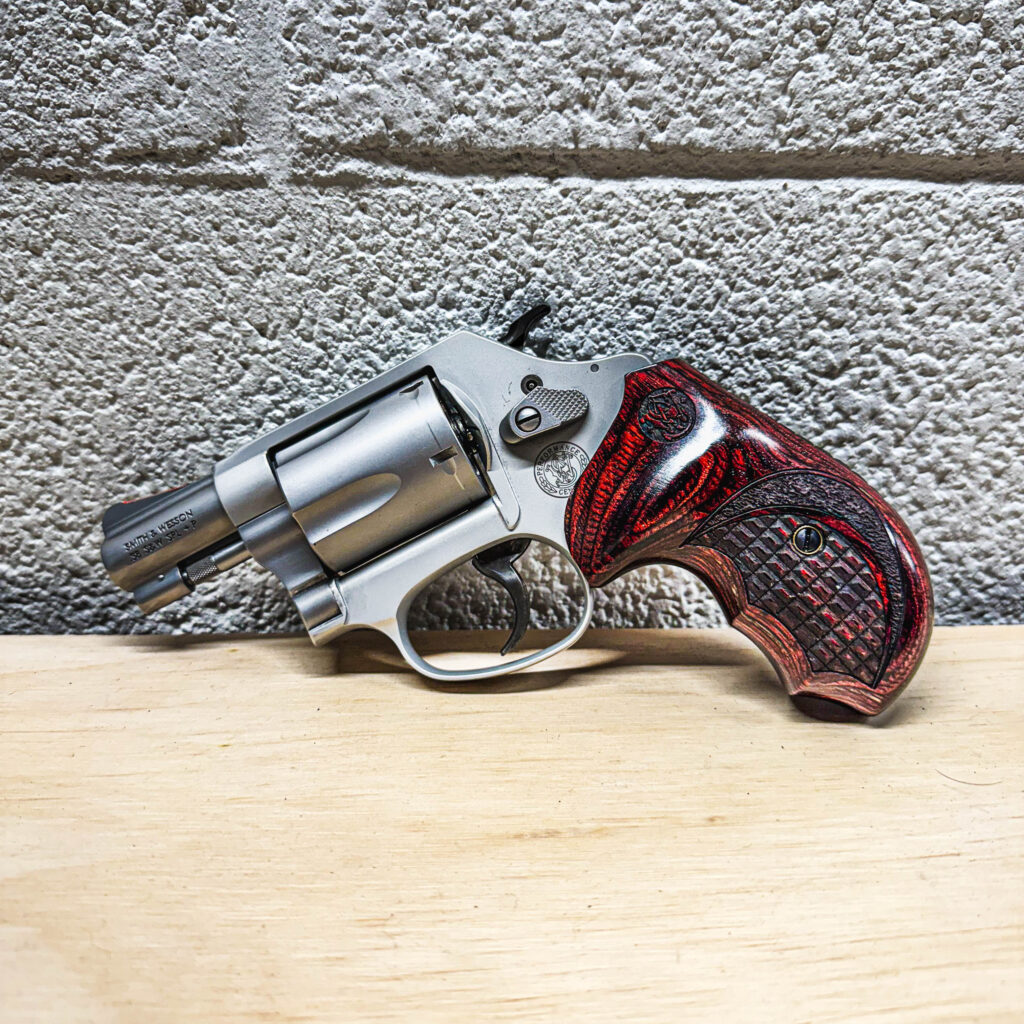
I feel that this sight picture is as close to perfect as I can get, but that is a matter of personal preference. All the sights mentioned here work well; you will have to experiment and see which works best for your applications, and more importantly, your eyes. Another version of this that I would like to discuss is the plain black sights that many either paint or add some nail polish to. This is a cheap, easy, and effective way to increase sight visibility. While it isn’t as good as a dedicated tritium or gold bead, it is leaps and bounds ahead of plain black sights. This type of sight picture is on my J Frame Smith and Wesson below.
There are other sight pictures, and other modifications that are commonly done, but I feel that these have worked the best for me, and should give you enough options without being overwhelmed.
Choosing the Right Ammunition
This is one of the most controversial topics in the concealed carry world. My goal here is to go over different bullet designs on a surface level. I am not a ballistician, nor an engineer, but I do understand internal, external, and terminal ballistics. For those who don’t, let’s go over that first. Remember, we are talking surface level, with some generalizations being made. I know there are exceptions to these rules, but if I wrote an article to cover all these misnomers and caveats, it would take one year to write and 20 hours to read, so we are going to cover the basics here. Internal ballistics are what happens inside the gun. This includes internal pressures, whether the firing pin has enough pressure to ignite the primer, recoil, and muzzle flash. External ballistics are what the bullet does from the point it leaves the muzzle until it impacts the intended target. This is where things like bullet drop and wind drift come into play (but I cannot imagine you are taking a shot with your carry pistol where that will matter). Terminal ballistics are what the bullet does when it impacts the target, until the bullet ceases to travel. I do not want to make this into a conversation of ballistics, but I want you to be aware of it.
There are 4 major designs of bullets that I see carried. The Jacketed Hollow Point (JHP), the Semi-Jacketed Hollow Point (SJHP), Lead Semi-Wadcutter Hollow Points (LSWC-HP), and standard Full Metal Jacket bullets (FMJ). I want to get this disclaimer out of the way. I have seen people shot with all of these, and none of them I would want to take their place. All work when loaded correctly and combined with the right gun. However, just because something works doesn’t mean we cannot find a way to make it work better. With this out of the way, let’s discuss FMJ bullets first. A FMJ is often a lead core with a copper jacket over the profile of the bullet. Often these bullets have the lead exposed at the base, but it is not rare to see the copper jacket cover the base, either. And I have not seen anything to indicate whether one is better than the other, but if you have, I would love to hear about it. FMJs typically do not have a “shoulder” on the bullet profile; rather, they have a gentle curve from base to tip. These bullets are often carried not because of effectiveness, but because they are economical. Yes, they will stop a threat, but many greater options exist. It is easy for people to carry these due to their prevalence and cost, but better alternatives exist.
Now for the Semi-Jacketed Hollow Point. And when discussing this, I also want to touch on the Semi-Jacketed Soft Point. These are bullet styles that are normally only seen loaded in revolver cartridges. The reason for this is that autoloading pistols can be picky about bullet shape and profile. It would be incredibly difficult to make a good performing SJHP that feeds reliably in most auto loaders. Occasionally, a SJSP can be seen loaded into auto pistol cartridges; however, due to the soft lead, these can be prone to deforming. These bullets offer fantastic performance from a revolver, but it is probably best that they stay there. The benefit of the SJHP is that they use a copper jacket to keep the bullet together and aid in penetration and retained weight, but the soft lead nose allows expansion at lower velocities. Make no mistake, the SJHP can also provide devastating performance from magnum cartridges as well. These bullets are often featured in many renowned hunting loads. A massive advantage to these bullet styles is that when you find one that gives good performance, they are often significantly cheaper than a premium bonded hollow point, but give equal performance. I am not saying they are “just as good” because each offers its own benefits and downsides, but both will perform when the correct projectile and loading is chosen.
Now, for a personal favorite of mine, the Lead Semi-Wadcutter Hollow-Point. The LSWCHP was a famed load for many years with both civilians and law enforcement alike when using the 38 Special. The particular load that gained so much fame was the Federal 38G loading. This was a 158-grain projectile that was moving at a nominal 800 feet per second. Federal still makes that loading, to my knowledge, but another fantastic offering is from Buffalo Bore Ammunition. Those familiar with Buffalo Bore know they most of their ammunition is quite hot. And their Item 20A (158 grain LSWCHP-Gas Check) is no exception. This load is pushed to 1000 feet per second and features a soft cast bullet that is gas checked. The soft cast lead allows for excellent expansion, but the gas check removes excessive leading of the barrel from the equation. For those who have read our series on reloading the 38 Special, you know I am also a fan of warm 38 Spl. loads. A future project you will see here is the use of the Rim Rock 158 LSWCHP-GC (the manufacturer that supplies the bullets to Buffalo Bore for their load) to develop our own defensive loads.
And finally, what is most likely the most common choice for most shooters, the Jacketed Hollow-Point. These bullets can also sometimes be “bonded”. Many fantastic loads exist with these bullets, and just about every ammunition manufacturer makes one. These bullets feature a soft lead core with a hard copper jacketing on the exterior. This construction allows for excellent expansion, weight retention, penetration, and reliable feeding in auto-loading handguns, when the right bullet is chosen. Most modern law enforcement loadings feature this construction as well as personal defense loads. This style of bullet is my choice when I am carrying one of my Glock handguns. If you are packing an auto-loading pistol, this is most likely what you are, or should be carrying.
Additional Guns
This is another topic that may be controversial. Many people do not feel that carrying additional guns is required, and some go as far as to say that it is foolish. If that is your opinion, fine, I won’t tell you that you are wrong, but I expect the same courtesy. I do feel that, on certain occasions and applications that carrying multiple guns is a very practical choice. Not because I plan on getting into some gunfights that mimic a John Wick scene, but I carry multiple guns for accessibility. My primary handgun is on my hip; however, I also elect to carry an ankle gun. The 4 o’clock IWB carry is excellent for many applications, but just the same as everything else, it doesn’t come without its drawbacks. One of the most prevalent drawbacks is the fact that in certain seated positions, the gun can be less effective to access and draw. This is where the ankle carry really shines. Ankle carry while in a seated position allows for easy, swift, and discreet access. Both while seated in a vehicle and in a standard chair, the leg can be pulled close to the body, pants lifted, and the gun accessed.
Another reason that some opt for an additional gun is the “New York Reload”. This is a term that means when your main gun goes empty, you dump it and go for a second gun. Back in the day, when revolvers were commonplace, switching to a new gun was faster than a reload, especially before the advent of speedloaders. For those of us who still carry revolvers, this can be a practical choice. It is one of the reasons that I have two J-frame revolvers.
My Choices
While I will not tell you what you should carry, I will tell you what I carry. And what I carry does change based on the occasion, but I will detail all of that here. I will start with my primary carry gun. I carry a Gen 2 Glock 19. This gun is completely stock on the inside, and the only exterior modifications that it has are the Grip Force adapter and a set of Ameriglo Protector sights with the Hi-Vis yellow front sight and the plain black rear. The gun is chambered for 9mm and carries 15 rounds in the magazine. The ammunition I carry is Speer Gold Dot 9mm 124 grain +P. I feel that is plenty for most applications. One thing I also do when I am only carrying one gun is to carry a spare magazine. I do not carry it because I believe that I will need more ammunition, but rather I carry it because the most common malfunctions with a semi-auto pistol are magazine-related, so in case I have a failure, I have a spare magazine to switch to.

Most of the time, I do carry a spare gun. This is a Smith and Wesson Model 36 No Dash. This is a 5-shot J-frame chambered in 38 Special and is rated for +P use. In this gun, I carry Hornady 110-grain FTX +P 38 Spl. The FTX projectile functions like a ballistic tip, but is flexible, so when loaded in tube-fed guns, it will not cause a chain detonation. This ammo is also just a solid performer for short-barreled guns due to that ballistic tip allowing for expansion at low velocities.
I do have another gun that I carry quite regularly. I primarily carry this when I am working out or on a run. This is a Smith and Wesson Model 637 Performance Center. This revolver is also a 5-shot J-frame, but this has an aluminum frame instead of a steel one. This is nice for when I am wearing sweat pants or gym shorts, as it does not cause much sag in the clothing. This gun does recoil slightly more than the Model 36 due to the reduced weight, but it is not at all unmanageable. And in this gun, I carry that same Hornady 110-grain ammunition. Both of my J-frames have painted front sights and plain rears. I would like to replace this model with one of the new Ultimate Carry J-Frames; however, I still haven’t found that money tree that we all keep searching for.
How to Carry the Gun
There are many ways to carry a gun. Some I like, and some I do not. But I am not here to tell anyone they are wrong, I am just here to share what works for me. On the topic of things that work for me, let’s discuss my most frequent carry method. And that is the Inside the Waistband carry at the 4 o’clock position. I do this with my Glock 19 in a Kramer #3 holster. This holster is hard molded from horsehide. One of the things I really find useful about this holster is the paddle-type extension that protrudes from the back. This allows for heavier guns to be concealed and stabilized with ease. Another useful feature is the adjustable size belt loops. These loops can be adjusted via screws from 1.25 to 1.75-inch loops. This allows for easy changes without the need to buy a new holster or different size belt loops. When I opt for an outside-the-waistband carry, I use a Galco Combat Master pancake-style holster. Both of these holsters feature a slight butt forward cant. This cant allows for the gun to be concealed much easier than with a traditional “0 degree” cant. Most of the year I wear the inside the waistband holster; however, during the cold winter months I will often opt for the outside the waistband holster to account for bulkier clothing.
For the Model 36 Smith, I normally carry this gun in a Galco Ankle Glove. This features an elastic band for the ankle, a suede protector, and a leather holster section. I opted to have the additional thumb break on my variant; however, models are available that are open top and use only a friction fit to secure the gun. While I am sure that the friction fit is enough, I like the extra security that the retention strap affords. I also have to use the extender due to my relatively thick legs.
For my 637 I use the Smart Carry holster. This is a deep concealment holster that allows me to carry the gun without the use of a belt. Instead, it is a holster that is attached to an elastic band. The holster is positioned directly in front of the groin. Do to placement, I will not be featuring any photos of this holster; however, a Google search of the smart carry holster will show what you are looking for. I am currently looking to get a Barranti Boot holster, which is attached with the Ulti-Clip system. This will also allow me to carry the gun without a belt, but do a more traditional placement, and allow for quicker access.
You will notice that I do not mention appendix carry here in this article. That is because I do like to do it, nor do I condone doing it. In my career, I have treated several patients who used this carry method and reholstered in an unsafe manner, causing a negligent discharge and shooting themselves. While none of my patients have died from this injury, I do not need to plant my face into a brick wall to know that it is going to hurt. Many will disagree with this, and that is fine, but I have seen enough to know that I do not like this style of carry. And some may point out that my Smart Carry is similar. And yes, the location is similar; however, Smart Carry tells you not not reholster this gun without either taking the holster off or moving your pants out of the way. For me, I practice that if I need to draw the gun, it is placed in an empty pocket when I am finished. For me, I feel this is adequately safe.
And now, friends, as always, I want to hear from you. What guns are you carrying? What is your favorite holster? Do you vehemently disagree with my stance on appendix carry? Head on down to the comments and let me know.
Until next time, friends
Chuck