
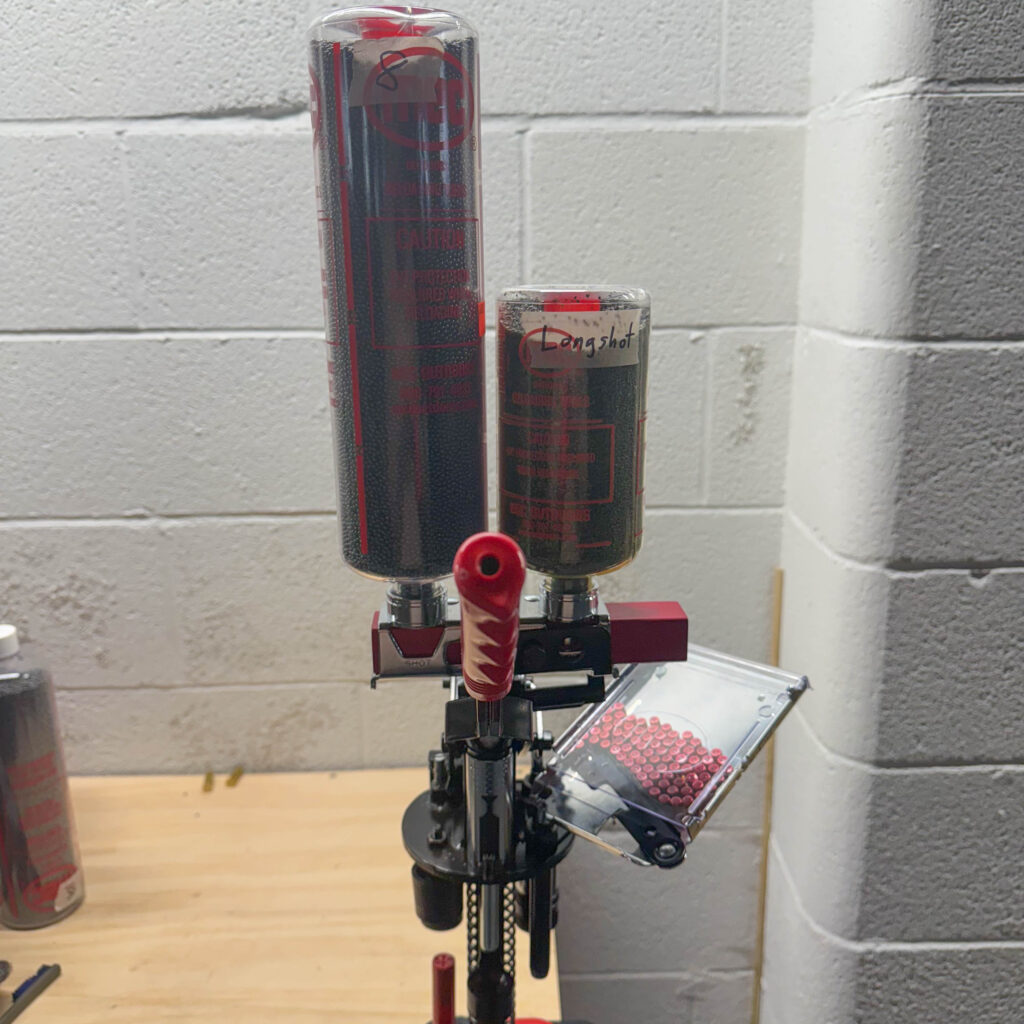
Garrett and I are always looking for something new to try. Whether it be a type of shooting, hunting, load development, or equipment, we always love to find something new. While spending some time reloading 38 Special, we had discussed some further reloading projects. We already had some plans for 44 Magnum handloads and 30-30 Winchester hunting loads, and then we looked into the corner of the basement. And there sat his Mossberg 835 12-gauge and my CZ Drake 28-gauge. And it donned on us. Why hadn’t we thought to reload our own shotgun ammo? So we talked about what gauge we would start with, what type of loads we would do, and where we would buy components. Lucky for us, our local gun shop caters to shotshell loaders. And on our next visit, we talked to the folks working at the shop. They recommended that we look at the MEC series of single-stage presses. It just so happened that they had MEC single-stage and progressive presses for 12, 20, and 28 gauge, as well as 410 bore. They also had everything we needed to start loading any of the chamberings we chose. I decided that since 28 gauge is the most scarce of what we load, we could start there. A few moments later, I had a press, primers, powder, wads, and shot. I had some hulls at home that could be loaded. So back to the bench we went.
When we made it back home, we headed straight to the bench and got all the new gear laid out. First, we unboxed the press and got ready to bolt it down. But before we drilled holes in the new bench, we pulled up the website for the good folks over at Inline Fabrication. When we saw that they offer a quick change plate for the MEC series of presses, we elected to use clamps to hold the press down until we could get some plates ordered. With the press clamped down, we then got the charge bar set up with the appropriate powder bushing for our load, and filled the hoppers with powder and shot. With the press set up, it was time to begin loading.
The Load
Before we get too deep into the loading process, I would like to go over the load we are using. The hulls are Winchester AA. The primers are Cheddite 209 primers. I have found that my local shop can keep these in stock quite regularly at a reasonable price, and I don’t have to pay for HazMat fees and shipping, so these are what we use. We wanted a good, versatile powder that could do more than one load, in more than one gauge. Powder supply being what it is, there were only a couple of powders we could use. We settled on Hodgdon’s Longshot powder. This is due to my shop having it in 8-pound kegs, the price being reasonable, and the ability to use several 20 and 28-gauge loadings. The wads are Claybuster wads that are a clone of the Winchester WAA28HS wads. Our shot is West Coast Shot Size 8 birdshot. And for this load, we did not need any cushions or overshot cards.
Load Specifications: 28 Gauge Target/Field Combination Load
- Hulls: Winchester AA
- Primer: Cheddite 209
- Powder: Hodgdon Longshot
- Powder Bushing: MEC #15
- Wad: Winchester WAA28HS (Claybuster)
- Shot: Size 8 lead birdshot, 3/4 ounce
- Crimp: Fold crimp, 6 star
The Loading Process
Now that we have our initial load established, let’s jump into the load process. The MEC 600 press is a single-stage press, which means that with each stroke of the handle, one action is performed. MEC does make progressive presses that can do multiple stages with each stroke of the handle; however, those cost more, are more complicated, and I just prefer a single-stage press. There are 5 stages on the MEC. The first is a deprime and resize stage. In this stage, the ram comes down, a depriming pin knocks out the spent primer, a sizing ring reduces the brass head down to factory specification, and then a cam releases the hull from the sizing ring. There is a bin mounted underneath the depriming hull, so you don’t have to chase spent primers, and they are easy to dispose of.
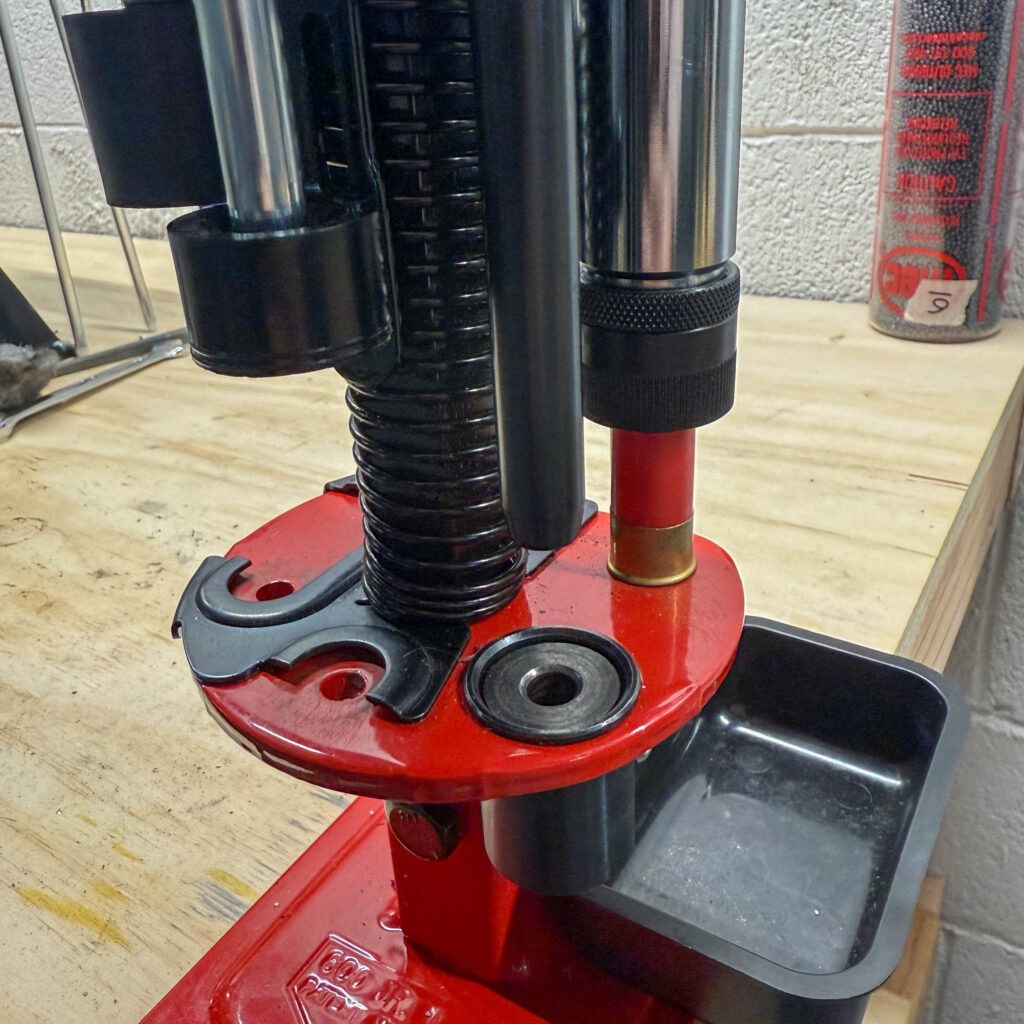
The second stage of this press is the priming stage. This features a spring-loaded cup, which, when the ram is depressed, will seat a primer in the primer pocket. There are two methods for getting a primer in this cup. In the beginning, we just dropped them in by hand. And that method works just fine, but it is slower and less efficient. So it did not take long for us to spend the extra $75 and get the automatic primer feed system from MEC. This is a bolt-on option that is actuated and drops the primer down a tube when a shell is in the final crimp stage. This is far superior to handling each primer by hand and risking dropping them, and then chasing them everywhere.
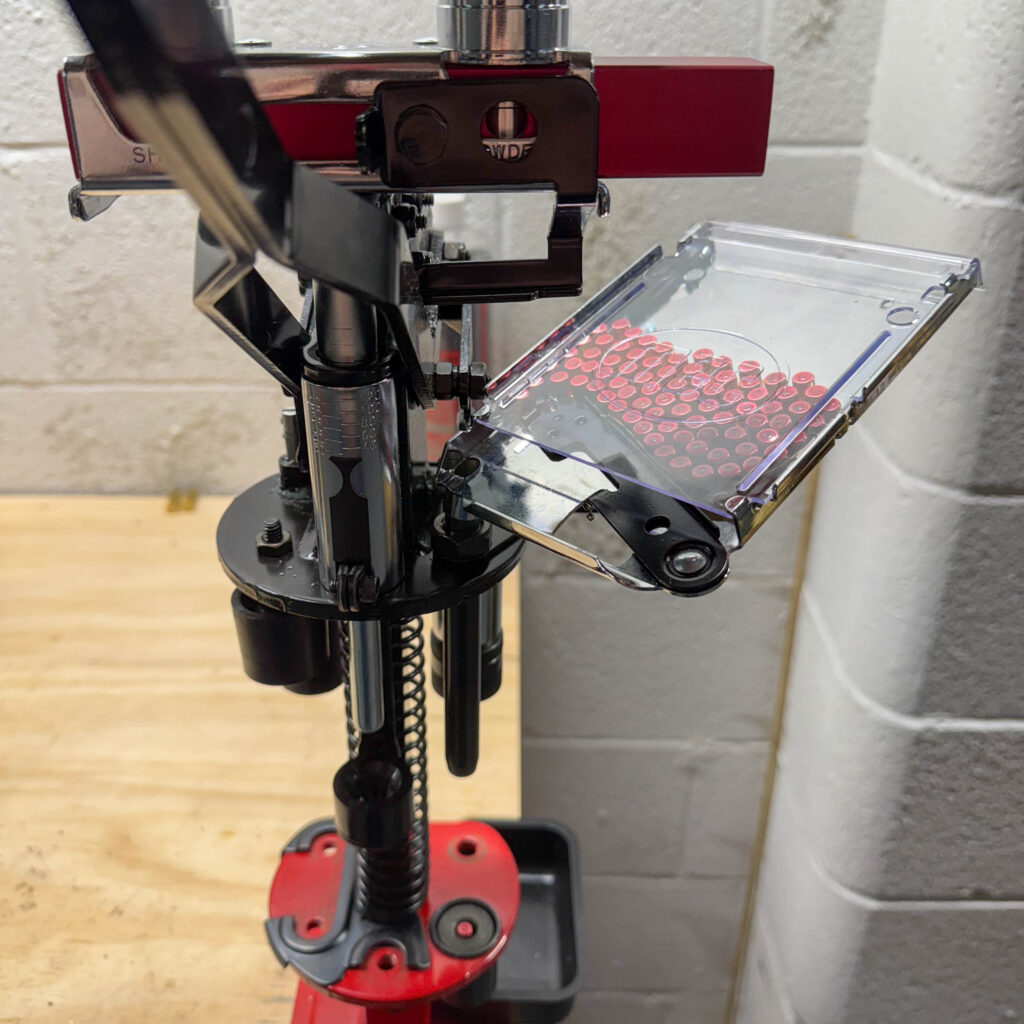
With the hull deprimed, resized, and primed, it is time to add some powder, a wad, and some shot. On the MEC, this is all done in the same position. When the shell is moved into the middle position, the charge bar is slid from right to left, causing a powder charge to be dropped. The amount of powder dropped is determined by what shot bushing you add to the charge bar. Reference your load manual for your desired powder charge, then go to the powder bushing section and pick the bushing that closest matches your desired charge. Be prepared for the bushing not to throw the exact amount of powder you want, but it will get you close. Each MEC press comes with three powder bushings that are common for that gauge, but be prepared to have to buy more. Luckily, these shot bushings are quite inexpensive.
With the desired powder charge thrown, it is time to seat the wad. The MEC does offer the ability to adjust wad seating pressure; however, I have yet to need to do that. There are several plastic “fingers” that help to guide the wad into the hull. Place the wad on the ram, and gently depress the ram seating the wad. No need to mash the handle to seat the wad, if you need more pressure, just adjust the ram.
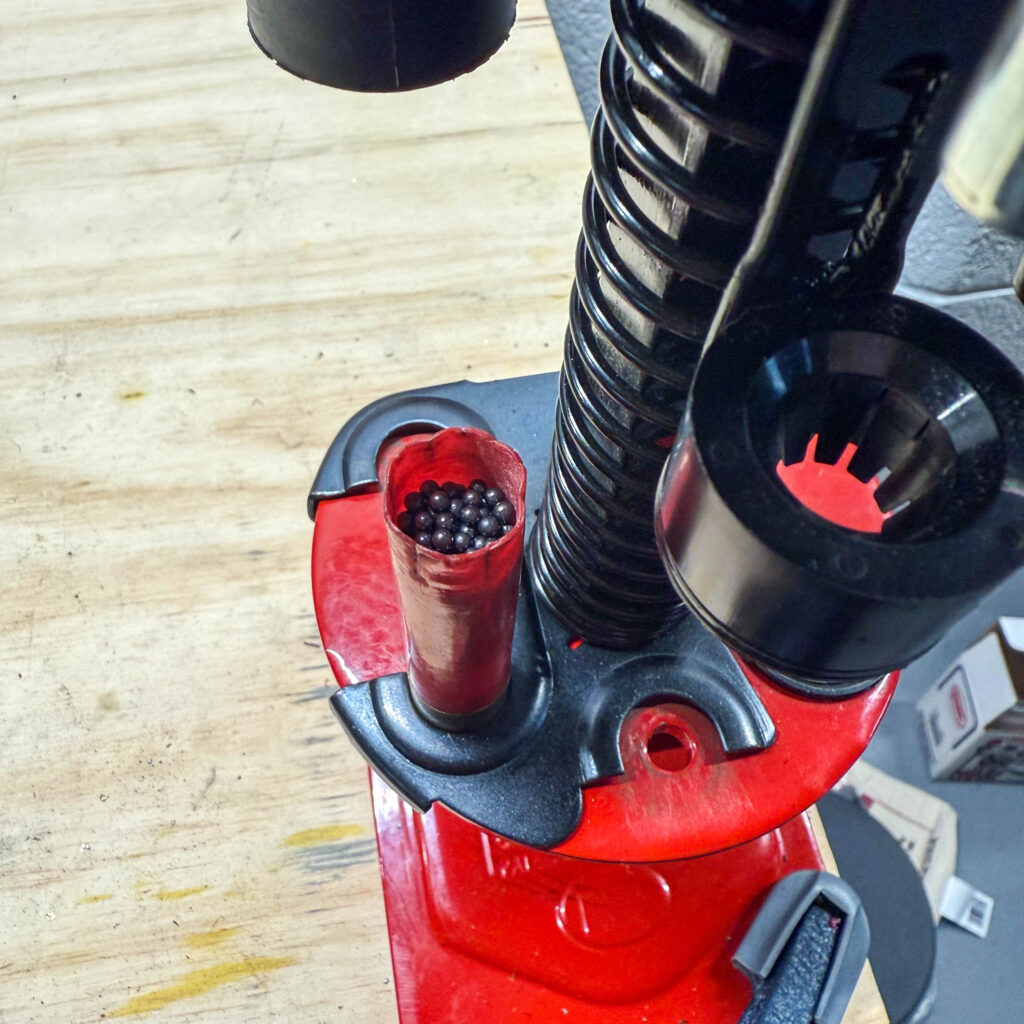
With the wad seated, now it is time to throw some shot. This is done by moving the charge bar from right to left. In the charge bar there is a hole that is sized to throw a predetermined volume of shot. This means that if you want to throw a different volume of shot, then you must buy a different charge bar that will throw that volume. These are also quite inexpensive. When the shot is thrown, the mouth of the tube should be seated just below the mouth of the hull. This allows for room for the shot to be dispersed, but not so much room that the shot bounces out of the hull and onto the floor. The appropriate height can be seen below.
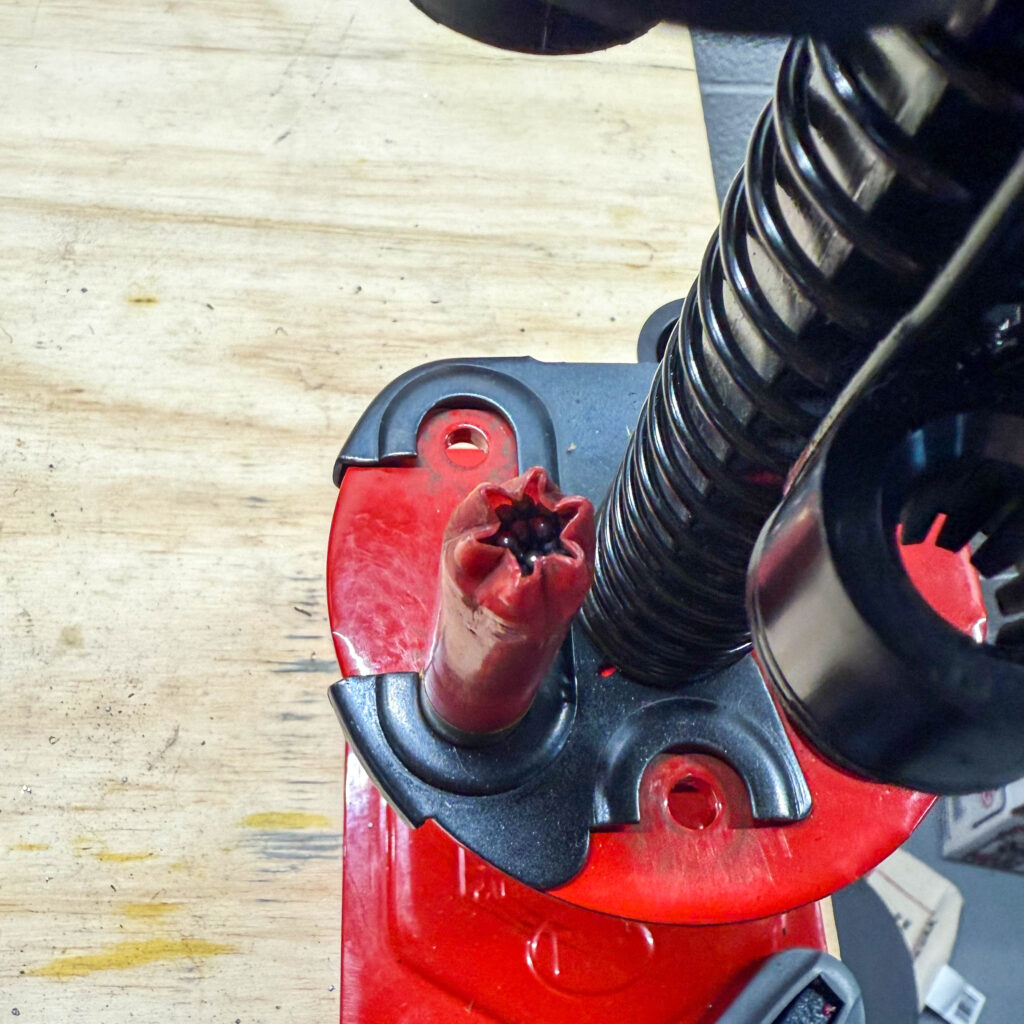
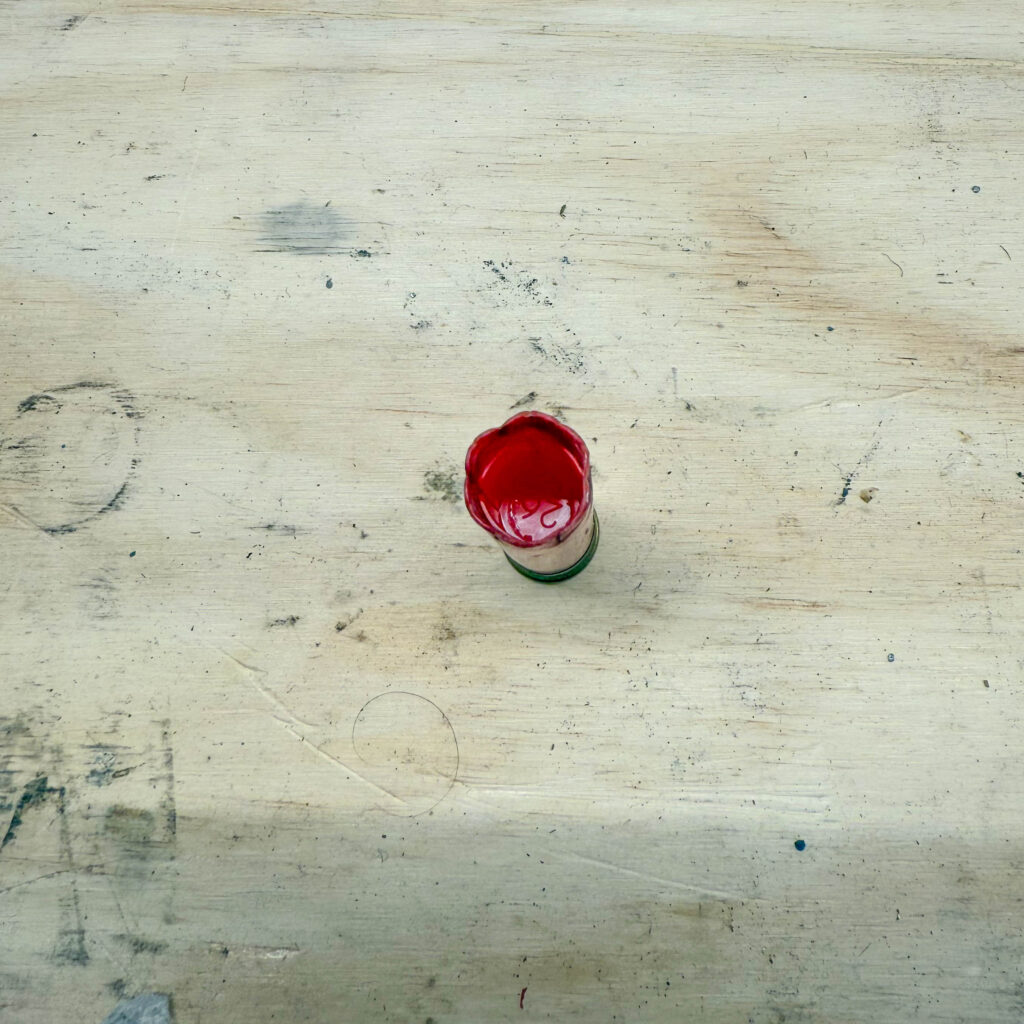
With the payload in the hull, it is time to crimp the shell. This is done in a two-stage process. First, a start crimp, and then a finish crimp. In the start crimp, the straight hull is partially crimped, the shell is slid back into the final position which presses the initial crimp into its final shape and depth. This is where the hull becomes a loaded shell. This is also the stage where a new primer is dropped if you are using the auto primer feed system. This is also the stage that will require the most adjustment due to the hull’s length and the wad’s size. Adjustment is quite easy: loosen an allen screw, move the arm up or down, and then tighten the screw. The user manual provides explanations with pictures to guide you on which adjustment is necessary.
The Finished Product
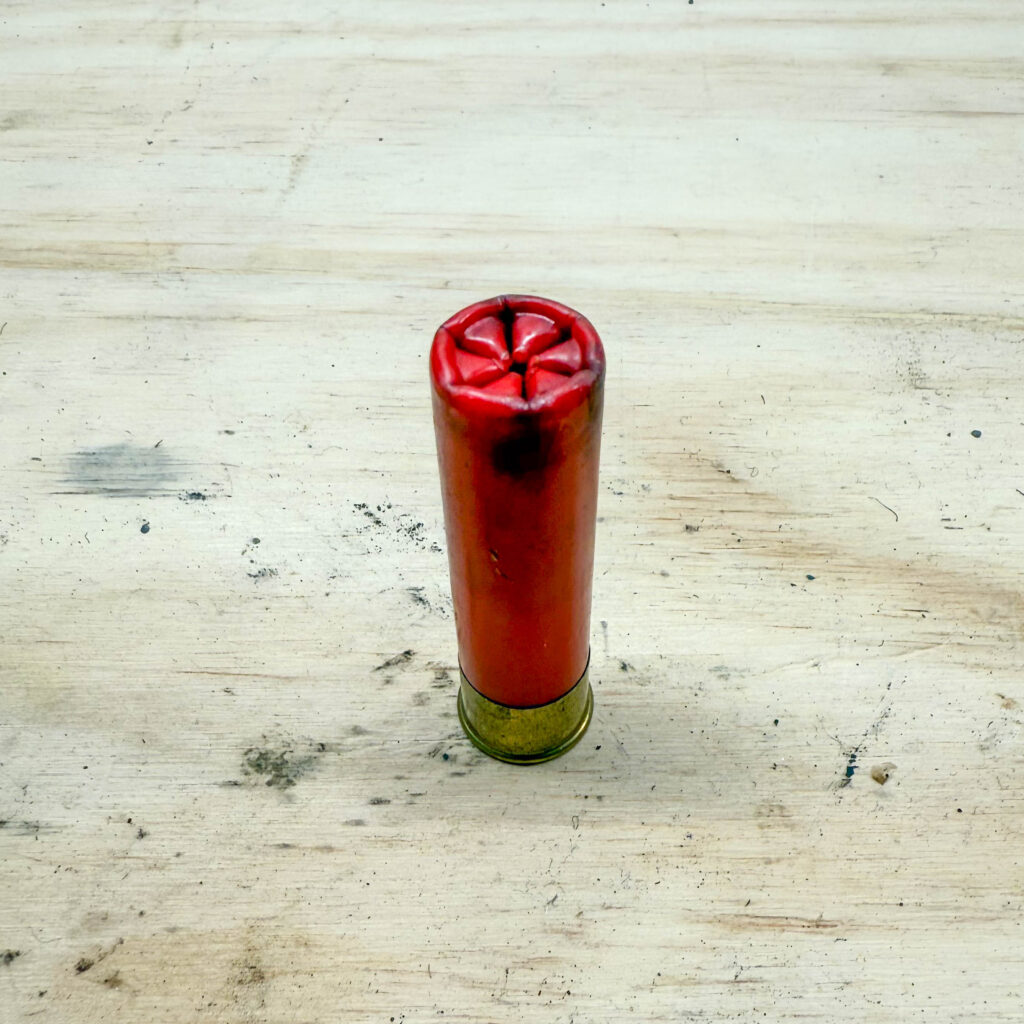
So, how did we do? For my first time reloading shotshells, I think our results are excellent. We got consistently seated primers, consistent wad seating depths, and consistently good crimps. The folds all lined up well with their original fold lines. This is due to MEC’s floating crimp starter. This crimp starter is mounted on a swivel ball, which allows it to lock into the original crimp lines well. The secret to getting good crimps here is to have both the pre-crimp and the finish crimp appropriately adjusted, as well as having the correct wad. I know I have the right wad, because I am using AA hulls with AA clone wads. So if something was off, it was due to the crimp. When the pre-crimp is adjusted appropriately, there should be a hole in the center, large enough for a shotshell primer to fit in, but not fall through. To get the correct finish crimp, there should be no swirling, no larger holes in the center, and no extra folds or wrinkles in the hull.
I took these shells target shooting as well as dove and pigeon hunting. It busted clays, it dropped doves, and sent pigeons down like a bag of rocks. This load has done everything I could ask it to. I may tweak the powder charge over time, but I am currently incredibly satisfied.
Adding 20 Gauge into the Mix
The process for loading a 20-gauge on an MEC is the same as loading a 28-gauge. However, here I will detail the load specifics and provide some pictures of the Remington hulls used.
Load Specifications: 20 Gauge Target/Field Combination Load
- Hull: Remington
- Primer: Cheddite 209
- Powder: Longshot
- Powder Bushing: MEC #16
- Wad: Winchester AA20 (Claybuster clone)
- Shot: 7/8 ounce, size 7.5 birdshot
- Crimp: Fold
Load Performance
I want to explain a concept first. This concept is, use similar loads for hunting and practice. I do not mean using steel shot to shoot trap with. But the same, or similar, payloads. Here is what this looks like for us. When loading and shooting 28 gauge, I use the same powder charge, wad, and payload when possible. I like this for several reasons. The first being that it reduces the number of on-hand components required. While loading components are coming back, there are still scarcities. The biggest of these is powder. Powder supply is a constant headache. You will notice that I use primarily Hodgdon’s Longshot. And I have already given you the reason for this. Those familiar with the practices here at the project know that we use Hodgdon, Winchester, and IMR powders. And all of these powders are manufactured by Hodgdon. I do this because I have used Hodgdon powder ever since I started. But also, at the time of writing, Alliant powder is pretty much non-existent, and when you do find it, it is absurdly expensive. Yes, I would love to experiment with some Alliant powder, but I cannot justify the cost. And I have been advised it will be another 2-5 years before my local shop starts seeing these powders regularly. And while shot and wads are pretty easy to get, I still would prefer not to have 30 different wads on my supply shelves.
Another reason I like to use similar loads is for consistency in practice. I like hunting with loads that perform similarly to my practice loads. When I am leading a game bird, I like to hold the same on the bird that I do on a clay pigeon. The phrase “practice makes perfect” is incomplete. It should be “perfect practice makes perfect”. I take far more shots on clay targets than I do at wild game birds, and I want my practice to match as closely as possible. While I cannot perfectly replicate the flight speed and pattern of a specific game bird, I can control myself and my equipment.
With that being said, how did we do? Let’s start with performance on the trap range. While shooting trap with my 28 Gauge, I noticed 2 light primer strikes, both on the top barrel of my CZ. I am not concerned about this being ammo-related for two reasons. The first is that it only occurred with the top barrel and not on the bottom barrel. The second is that I have had this problem before with some factory loads, also only on the top barrel. This is indicative of an out-of-spec firing pin or spring, and not of poor-quality ammunition. I only report this because it is a problem that was had, and I try to be as transparent as possible. If there were any issues on the trap range with performance, they could almost all be traced back to the “loose nut behind the buttplate” (the shooter).
In the field, I have shot numerous doves and pigeons with this load, and it has performed without flaw. I did not notice any issues preventing me from achieving a clean, ethical kill. I cannot ask anything more than that. I should note that while the load specifications above list size 7.5 birdshot, I did also load around 75 shells with size 6 birdshot; this is what I shot many of the doves and pigeons with. The 7.5 I tend to keep on the trap range. While both would be adequate for our purposes, the size 6 loads do perform slightly better afield.
One more note on performance. This load is not excessively dirty or harsh. While the 28-gauge is inherently a soft shooter, it can be loaded fairly stout, but those loads are not featured in today’s article. If I need more than the top end of the 28-gauge capabilities, I have a wonderful 20-gauge that works quite well. Speaking of 20-gauge, we saw equally excellent performance. The 20-gauge really shone with dense pigeons. The 28-gauge killed them, but the 20-gauge folded them like Martha Stewart taking clothes out of the Maytag, especially with the size 6 loads.
What We Liked And What Needs Improvement
I love many things about reloading with the MEC presses. The first is the durability of the press itself. Everything on the press is sturdy, stable, and solid. Nothing on the press feels cheap. Even the parts that are plastic are well-made and quality. Again, my goal is not to make this a MEC VS Loadall, but the Loadall flexes and bends, the stroke of the ram is not even every time, and the press just feels cheap. Now I cannot expect much for the cost of the press, but it further proves that the MEC is worth the extra money.
Another thing I love about the MEC is the adjustability. Every stage is adjustable for your needs. The sizing and depriming, the wad seating, the start crimp, and the finish crimp are all adjustable, and some of these stages are adjustable in multiple ways. I cannot think of a single aspect that would need to be adjusted that is not capable of adjustment on this press.
A huge advantage for the MEC press, for us, is that our local shop stocks piles of spare parts for the MEC presses. One example is the rubber insert that goes in the charge bar. I had a piece of shot that managed to find its way into that piece and deformed it, causing the sliding of the charge bar to not be as smooth as it should have been. A 15-minute drive and my shop had exactly what I needed. I understand this won’t be the case for everyone, but it is for me, so I feel inclined to tell you. They also keep plenty of charge bars, additional hoppers, and powder bushings on hand.
What are some things I would like to see improved? I would love to see MEC put out more in-depth videos on press set-up and diagnosis of problems. In the beginning, I had some issues sorting out the settings of the start crimp. The exact details were a little hard to find, and I did not see them noted in the owner’s manual, even after I did find them. The issue I had was how do I know I have the start crimp set to the right height? The answer is for the hole in the top of the hull to be large enough for a primer to fit into, but not to fall through. I did find this information from them, but I had to find it in a video detailing the setup of the progressive series of presses. I did not find this in the video on single-stage presses or in the owner’s manual. And as far as complaints go, that really is about it. I have found these presses to be phenomenal. In the quest for things that work, the MEC 600 JR. Mark V is definitely on the list.
As always, friends, I want to hear from you. Have you used this equipment? Do you have a press for shotshells that you prefer? Head down to the comments and tell me about it.
Until next time, friends
Chuck